Digitising Your Old Tapes
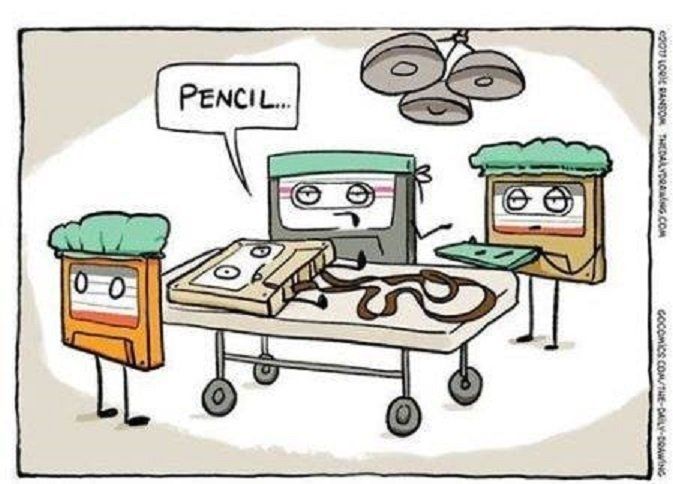
All credit to Lorie Ransom for this brilliant cartoon.....
I am no expert on how this process is done. All I know is the advice I have received from generous friends with far greater technical skill than my own, and their suggestions seem to work.
Pardon me if I’m teaching you stuff you already know. And pardon the waffling on.
I’ll begin with audio tapes, and go onto video tapes later if anyone is interested.
I’m guessing most people are wanting to digitise cassette tapes. Your motives will govern what sort of standard of kit and process you want to get involved in. You can go all the way up to what I think you could describe as archive standard, all at home.
Luckily, there is a super-fast way to achieve what a lot of people actually want, which is, for example, a digital copy of some deteriorating single cassette containing the voice of a treasured relative. They aren’t too worried about sound quality, they just want the recording not to be degrading away in the cassette box. Remember though, this is the most basic method.
(By the way, practise this procedure with an old commercial cassette first: if your target tape really is on its last legs you might only get the one shot at this.)
So, to get a digital copy of a cassette tape, all you need is a cable that you probably already have in a drawer somewhere, or is just pence on the web, or at a local hi-fi store. It has the same plug both ends, and one end goes into the headphone jack on your tape machine. Simple.
The other end goes into the back of your computer using the line-in jack. Then download a recording program such as Audacity. I could go through troubleshooting what to do if you press play and nothing appears on screen, but every computer and operating system is different, so that’d be a whole article right there. And Audacity have their own help videos, as do many other audio-world helpers. I’m also not going to go through recording at a sensible level, I’m pretty sure you can work that out.
No line-in jack on the computer? – there’s another sort of cable you can try - but I personally haven’t - with a plug one end for the machine, and a USB for the computer the other. They probably work.
And there you have it – a quick copy of the treasured tape so you at least have two versions. No adjustments or cleverness, just a copy.
I’m now going to go to completely the other end of the scale – what I think is the archive-quality-or-thereabouts method. What you personally want to achieve will, by definition, land somewhere between the two.
We’re going to consider the following:
1 The tapes themselves
2 The machine you are playing them on.
3 The cables you use.
4 The box you use to convert the analogue signal coming out of your machine into a digital signal. (And why Audacity and your computer aren’t really doing a job to the standard you want.)
5 The set up for the computer, preferably an old one you haven’t got round to chucking away, but that basically works.
6 What standard to archive the digital files at, and what to store them on.
7 What to keep, and what not to keep.
Here goes. The guiding principle is to get as much info (in tech terms) from the cassette to the storage medium. The first method we’ve just gone through has too many shortcuts to be really effective, especially if you are doing lots, possibly hundreds, of tapes, with the maximum of reliability and the minimum of monitoring and fuss.
So, in order:
1 The tapes themselves
Personally I think damage is far more likely going to come from the machine, but there are some precautionary things to do to the cassette first.
Bear in mind the thing that tapes hate most is to be played when they are loose in the cassette: this gives the machine a chance to grab a bit of tape and scrunch it up. So even if you use the tried and trusted method of using a hexagonal pencil or a hexagonal ballpoint pen to wind the spools so any lack of tension is taken up you’ll be doing yourself a huge favour.
Tape machines usually don’t mind cassettes that have taken a beating: it is the tape path that is important. But if the plastic is really damaged then it is completely possible to cannibalise a cassette you don’t want that has screws holding it together and if necessary bust the old one open. Yes, you are going to feel like a bomb disposal expert lacing up the old tape in the new cassette, but like all these things, practice with a cassette you don’t care about before you do the job. See how it looks and where everything goes before you start taking the component bits out. Take a photo on your phone or open up another cassette for reference. Trust me, back in the 1980’s people opened up cassettes and changed tapes all the time – it came with the technology and the times.
What if you have a scrunched up bit of tape that you think will never make it over the tape heads, or even worse, break and very probably also gum up the physical works of your machine?
There is a solution, and it is in three parts.
If it is at the beginning of the tape (the most likely location) then hang on a minute, we’ll come back to that.
But let’s say it is in the middle of the tape. You know roughly where it is, so record onto the computer up to that bit and stop. You’ll be able to see the scrunched up bit of tape on the spool if you look closely enough through the little window, and when you see that coming you have about a second to hit stop.
Eject the tape. Wind past the damage using the pencil method and then record the rest of the tape on the computer.
Now DO THE OTHER SIDE OF THE TAPE, following the same procedure. Now it is time to make a decision. Personally I’d take a chance and dub the scrunty bit off and risk it busting, because a wobbly recording is better than no recording at all, right? But take a listen to what you’ve already got on the computer. You may be able to do a slick edit. Then you can make a decision.
OK, I’ve delayed on this – the problem is at the beginning of the tape – so as not to scare the horses. This is what you do. As always, record what you can bon both sides before you do anything else, using the pencil method. Then open up the cassette and cut the tape just where it starts smoothing out with a razor blade or scissors. It’s going to curl up like a bedspring in an old cartoon, but this is normal.
The brown tape is joined at the beginning of the spool to a piece of see-through tape called the leader. You can now do a couple of things. First, see how the leader is clipped to the spool with a small lug of plastic. Get the assembly out of the cassette because this is fiddly: you are going to slide out the lug and replace the clear leader tape with the rest of the post-scrunchy tape. If you cut just before it went scrunchy, you won’t be losing anything anyway. Reassemble the cassette. This means that when you press play you will start immediately with recorded material.
Yes, there is going to be a gap because of the bit you cut around, and yes you will never recover the missing piece. But I honestly don’t think there is any other way of saving the bulk of the recording any other way. Also, I don’t think a pro lab or workshop would be able to offer any other method.
What they would do I think, and you can do this too if you have any editing tape, is cut the tape and join it to the leader. You can do this if you have the skills, you can even do it with sellotape (I can hear the audiophiles’ screams from here) so long as you NEVER let that bit go past the heads in either direction. That will truly mess everything up – tape and machine.
2 The machine you are playing them on.
So far we’ve maybe used up a few old cassettes. But now we might be about to spend some money.
Why?
Your old cassette player (I mean the type about the size of a big hardback book with the big keys), or beatbox, has several disadvantages.
Firstly, and most important by far, are the outputs available on the machine. A beatbox or similar has its speakers and headphone jack. Fine for listening while doing other things. But it is unlikely to have a pair of phono outputs – the left and right leg of your stereo sound. BTW, we’re not so worried about stereo sound in itself – we just want as much information, whatever leg it is on – off that tape.
And secondly, even if it does have phono’s, the whole tape head and transport system of cheaper stuff isn’t much good. If anything is going to chew a tape, it’ll be this.
And thirdly, the internal circuitry isn’t going to be much good either.
OK. So what we need is something we can get a phono output from, that almost by definition will have a better tape transport system and internal circuitry. The good news is that you probably already have the required bit of kit, and it is either in your living room or in the loft. It’s the old cassette machine you had as a separate part of what we old farts used to call ‘our hi-fi set-up’. How do I know you have this? Because you date from the time of cassettes, or you wouldn’t have those tapes to save right now. (There is probably one exception to the “phono as minimum” rule, and that is if you have an old professional cassette recoding machine. I still have my ex-BBC Sony Pro which had an astoundingly good reputation for build quality and electronics and yes, I used this plus a jack coming out of its line-level output.)
OK. You’ve found your old standalone cassette deck of a reasonable quality (a brand name you recognise will always help – Sony, Hitachi, NAD, you know the sort of thing) and it has phono plugs and you’ve plugged it in and it still works. This is what you’ll be using, and if you don’t have such a thing, buy one off eBay. You should be paying about £40 (keep an eye on postage and only buy a guaranteed tested and working machine). Remember, this thing is going to sit in the corner of your room processing hundreds of tapes, once and for all. Don’t stint now and record at a lower quality than you have to. (Remember when you are done, so long as you’ve held on to the cardboard box it came in, you simply package it up and sell it again on eBay. Who knows, in an auction market, you might get more than you paid for it.)
3 The cables you use.
You’ll probably have a spaghetti-bowl of cables with the cassette machine and other separates. You can probably get away with using those. Personally, I had the “I’m only doing this once” thing between my teeth and I had videos and DATs to dub, so I bought the right cables for the job. RS or Canford or similar are the people for this sort of thing, and they’ll also sell you the head cleaning materials I forgot to mention for the heads on your machine.
4 The box you use to convert the analogue signal coming out of your machine into a digital signal. (And why Audacity and your computer aren’t really doing a job to the standard you want.)
OK, if you’ve got this far, here comes the first real expense.
So let me repeat that the phono-out signal is such an improvement on the headphone jack method right at the top of this article that even if you now ran that into your computer and let Audacity handle it you’ll have done the archiving world a service.
But I’m going to suggest you need an external digital converter.
Why? Unfortunately computers were never designed to like analogue signals coming into them, so the plug is an afterthought to computer wonks and is very often physically connected to the motherboard, it’s not even a true plug. Therefore the connection is rarely a good one, and your precious info is being lost. Also, the digital conversion within your computer is not one of the best bits of tech inside it: all sorts of noise and other unpleasant things can creep in. (The jack to USB cable options retail at pence, so they are not going to be part of your digital conversion in themselves, even though the USB gives the impression something digital is going on.) But I’m no snob, phono’s will have upped your game so much you might like to go straight into your computer and fire up Audacity and you’re off. Phono to jack cables are pence on the web.
But what you really want is an analogue to digital converter. This way what is going into your computer is already digitised which is what the computer wants and it set up for. What to use? Well, as I said before, I was digitising reel-to-reel tapes of old shows I’d worked on, plus DATs, and then I was going on to do videos. So there was no point doing it duffly. I spent ages on the web trying to find the model for me, and I asked some BBC sparks whom I trusted. One brand name came up over and over as being professional in quality rather than what you might call high-end amateur, and I went with that advice and I’ve been really happy with it: Focusrite.
I bought a Focusrite Scarlett 2i2, costing just north of £140ish. (Once again, you can sell it on eBay or similar when you are finished and probably recoup a large percentage because you can honestly say you used it only briefly. And I am using mine now for other jobs nothing to do with dubbing.)
You can of course choose whatever unit you like. My logic was – name recommended by professionals; had XLR connectors, a sign you are probably dealing with proper kit not amateur stuff; could handle stereo; could handle 24/192 (we’ll come to this later); and had adjustable gain controls and peak indicators.
OK. The connectors you’ll need will be phono to XLR or to quarter-inch jack which you’ll probably have to buy, as there’s no real hi-fi need for those.
Once connected, the Focusrite will download lots of bits of nifty software and set itself up. You’re good to go.
Bang in those tapes and set them recording happily on Audacity and you can congratulate yourself on a job well done.
Or can you?
5 The set up for the computer, preferably an old one you haven’t got round to chucking away, but that basically works.
Here we go, this next bit is going to seem taking it all a bit far. I am going to try to persuade you to do all your dubbing on an old computer.
Why? The first reason is really simple. Your existing computer is probably set up to make a sound when an email pops up, or you turn on your printer. These sounds will appear on your archive recording, and you don’t want that. Even if you aren’t retaining these recordings to be played to anyone else, you can bet that annoying bleep will obscure some fact or sentence you really want to hear. The second reason is a development of this: I use my tower for everything. I do not want to be routing a recording through it at the same time – it is too much to manage. Before you say ‘get with the multi-tasking’, try it. And I also like to listen to Spotify while I’m writing – well, I can’t do that because it shares the circuitry with the recording, so that is out. If you have lots of tapes that is literally months sitting silently at your computer. No thanks. The third problem is a bit more technical – properly recorded sound files are big – or at least big in a domestic context. They’ll soon fill up your hard drive and slow everything down, or refuse to save because there isn’t enough space.
I didn’t fancy any of this so I got an old computer out – finally, I said to myself, this is why I kept the blummin’ thing. Fortunately I also had an old monitor as well. It was these two that I set up on the other side of the office, and every now and then bunged on a tape and dubbed it. I didn’t have to do any more than spool in a couple of minutes to check the level wasn’t too high or too low, and then go back to the beginning, press play and leave it. I could then go out, play music, do anything I liked, because even if I recorded hours of silence after the tape stopped on Audacity, well, who cares. It was gone in a mouse-click.
(When I progressed to video, I’d had such a successful summer of using a standalone computer for dubbing hundreds of hours of audio there was no going back. Then I discovered the video equivalent of the Focusrite needed a USB-C jack on the computer because of the higher data speeds. To my own surprise, I bought an old refurbished tower unit – just the tower, nothing else – from a second hand computer company for about £250. I just used it for that job and could then get rid of it.)
6 What standard to archive the digital files at, and what to store them on.
We’re nearly done. I would suggest you record at 24 bits per second, and at 48khz, or “24/48”. This is a recording quality that would satisfy a studio engineer, and is way in excess of the cassette tape you are dubbing. You literally cannot get more info off the tape, so don’t go any higher. The 48k selection on Audacity is made in the bottom left hand corner of the Audacity screen, and the 24 bit when you come to save it as a WAV file. Don’t save it as an mp3 file, you can always convert it later.
One hour of WAV to this quality standard is approximately 1 gigabit of memory. So, 100 hours of cassette is 100G. You can see how you’ll be needing some separate external storage. This is now ridiculously cheap – you can get 1TB (ten times what you need) for £40, and that’s from proper makes like Western Digital or Toshiba. You are going to need two external drives, each one identical (OK, that’s £80 in our example) because one is going to go in your cupboard, and if you are like me you, the other is at my brother’s house. The idea is, if my house burns down, or the drive malfunctions, I have another exact copy it in another place, the holy grail of all archives. You can keep your original tapes, of course, the ultimate archive.
You’ll notice I don’t store things on the cloud. I don’t because I just don’t trust it. Two physically separate locations and the originals suits me fine.
7 What to keep, and what not to keep.
This is an easy one to finish on. Everything. Every last thing, keep it. What are you wasting? A few digits.
If you chop and choose what you are recording to your current standard of what is interesting, the other info – how people asked for tea, said hello, said goodbye, rephrased questions, steered off contentious subjects, ploughed on when it all got sweaty – these are of huge value to future historians. What would we give now just to have a couple of minutes of say Churchill chatting as they got ready to record “We shall fight them on the beaches”? We’d be eavesdropping on one of the most important days in history, gaining who knows what additional insights along the way. Remember, in recording grandma or that veteran of the First World War you have an entire take on a life, not just the subject at hand.
You are now, remember, an archivist. You don’t know of the future uses to which your stuff might be put.
And of course, once dubbed, you can play with your new Audacity toy (editing a copy not the original, safe on the drive) and isolate the special bits you want to keep.
OK, that’s it. This is just my opinion and you are free to agree or disagree with any of it. I hope, however, that it is useful.